Make your own Bible Journaling Tip-in

Have you been toying with the idea of journaling about your journey with Jesus but don’t know where to start? Todays tutorial is just one way to add artwork to your Bible, especially if you don’t have one with wide margins.
If you have a journaling Bible with wide margins, you could do your artwork there, or even in a separate art journal. There isn’t a right or wrong way to do it, you can simply get started with what you already have on hand.
If you don’t have a journaling Bible with margins, you can jump right in with any Bible you already have by doing your art on a piece of paper or vellum, tracing paper or even deli paper that is later inserted into your Bible. The advantage to trying new techniques on a separate piece of paper is that you can feel free to try new things without worrying that it might not turn out how you like it. If you like how it turns out, you can add it as a “tip-in” (taped to the inside edge of your page) or a “tip-out” (taped to the outside edge of your page).
 .
. 
Keep in mind that it doesn’t have to be perfect. Technique can be the #1 hindrance to getting started. The focus should not be the art, but rather the significance of the message and what it means to you. It’s about the journey of faith you are documenting. Take one step at a time. There are as many different styles of Bible journaling as there are women. Create your own style of beautiful and jump in right where you are.
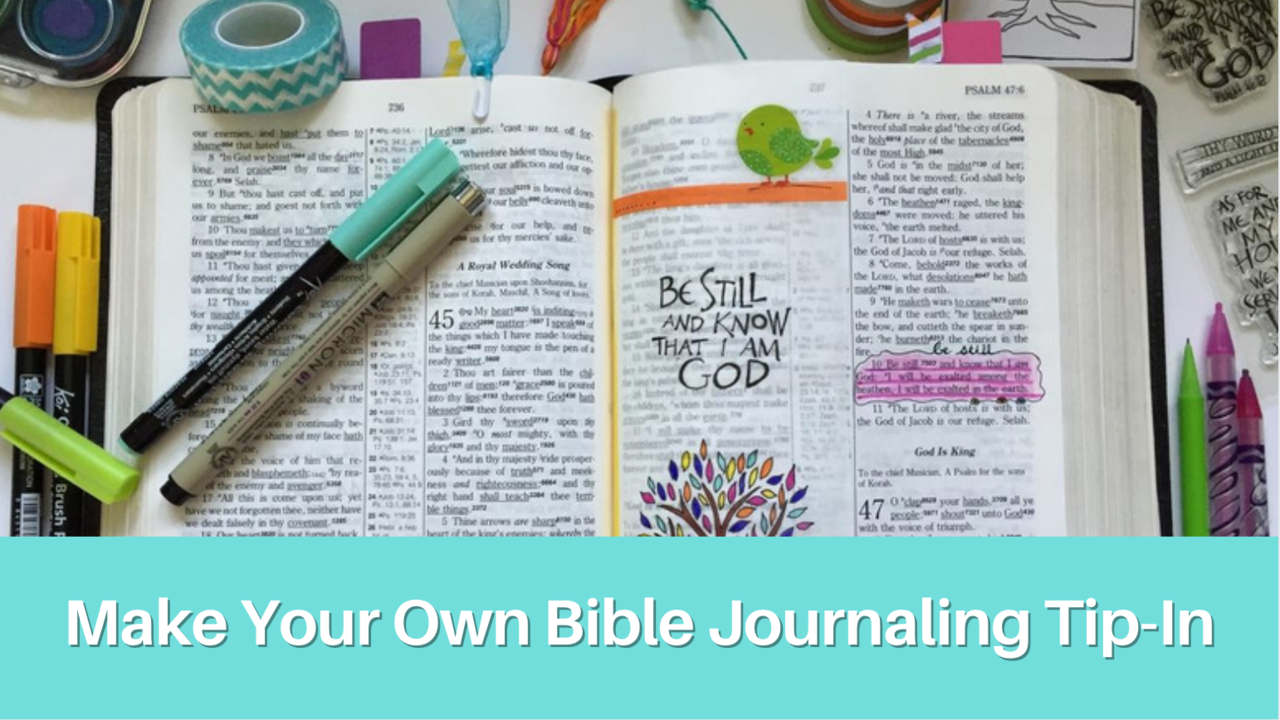
The verse I’ve chosen to Illustrate today is Psalm 46:10 “Be still and know that I am God”.
First highlight the verse and choose where you will add your artwork.

Next place your chosen artwork behind a piece velum, tracing paper, or deli paper and trace it with a pencil or pen.
I find it helpful to tape the image to the back of the tracing paper so that it doesn’t move while I’m working.


After you’re finished tracing it, color it in with markers, colored pencils, or leave it black and white if you prefer.

Now it’s time to add the text. You have the option of hand lettering the words, stamping the words, or adding stickers that spell out the words. I decided to use Joanne Fink’s stamp to go along with the tree image that I used from one of her adult coloring books. 
I love adding embellishments. Have fun with this part.
Washi tape and stickers are a fun simple way to brighten up a page with color, and I’ve added a few elements to the top to bring it all together. Another alternative on this page could have been a sticker or lines made with a marker where the washi tape was added. The possibilities are endless. This is your chance to unleash your creativity.

Step 9: Time to add the finishing touches
To insert the velum strip, add a piece of washi tape to the one side of the strip. Lay the whole piece on its back so that you can slide it easily into the crease of the page, then lay it over so that it adheres to the page. This way you can easily lift it out of the way if you wish to read the text later.


Make sure to date your entry so you can keep track of your journey and what you are learning in your walk with God. I love looking back and remembering the time I spent in His presence.
Use your journaling time as an act of worship. The time spent reflecting on God and His truth is invaluable.
Inevitably you’ll want to doodle in the margins too, so I’ve created a Doodle Cheat Sheet for you to print out and put in your Bible to get you started on this path to deeper intimacy with Christ. You can grab it HERE .
Make sure to join our private Facebook Group for more tips and helpful tutorials. I look forward to connecting with you there.


